I was inspired by van Gogh's "Still Life with Pears". For the lesson I would talk about Van Gogh and his impressionistic style, and stress the importance of doing this quickly, and not worrying about it being perfect.
-J
My Crafty Beautiful Life |
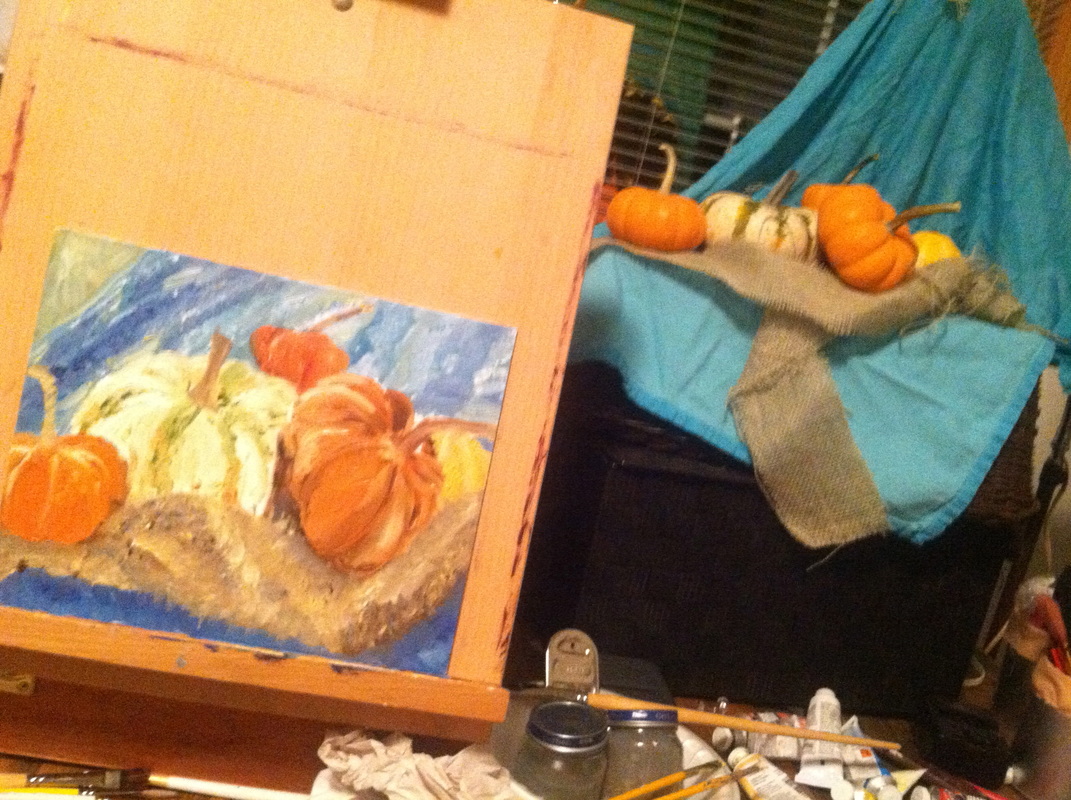
I thought I would give one more painting lesson idea post for this week. I posted this painting this fall and I had a few people ask me to paint one for them. Honestly, this is probably the least amount of time I have spent on any of my art projects during my time in college! This still life was completed in one long setting, with a short second setting that was for finishing touches. It probably took a total of 3 hours, if that. This is actually one of the first still life's I have set up on my own, I do not do much art from life, and I really need to have more practice with that! This turned out to be a good exercise for me. I was inspired by van Gogh's "Still Life with Pears". For the lesson I would talk about Van Gogh and his impressionistic style, and stress the importance of doing this quickly, and not worrying about it being perfect. 
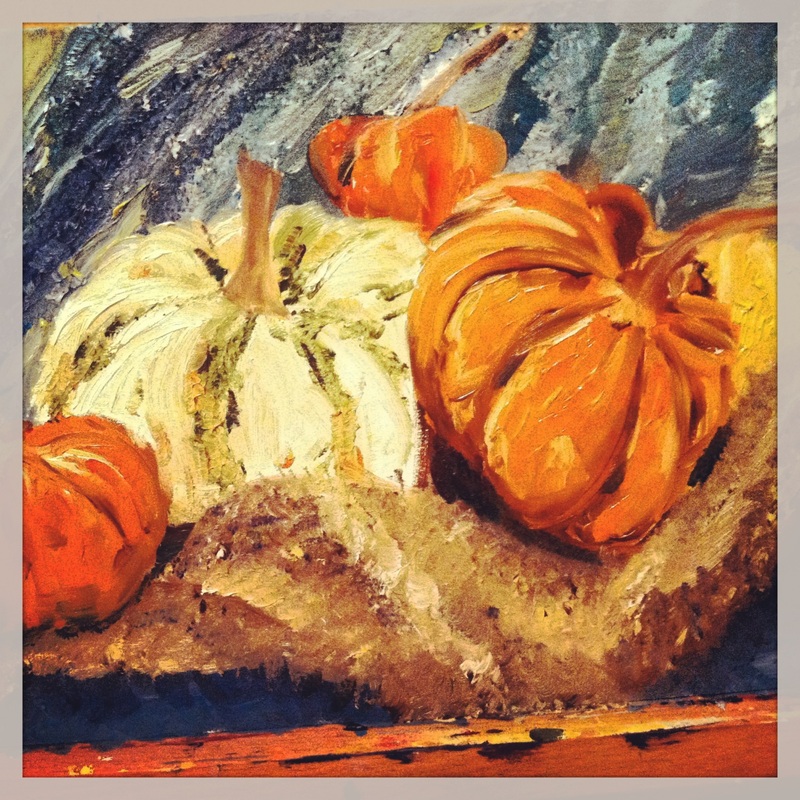
All I did was set up my still life, quickly draw the basic shapes that I saw on a small canvas, and then began painting with oils! I blocked in basic shapes with broken color- meaning I didn't just use paint on one flat color, I mixed my colors on the canvas. The key to creating shadows is adding hints of the complimentary color to the main color (orange's compliment is blue). I layered on a lot of paint and this created actual texture on the canvas. These images show the process from the drawing, blocking in the background, then each shape of pumpkin. I definitely recommend doing a still-life with pumpkins! They are so interesting and can vary in color so much! There are also close ups of the texture and the changes in value of the paint because of the way I mixed it on the canvas. I really like how it turned out! Below is the lesson plan I developed with this painting. Other resources and videos I used are included at the bottom of the lesson plan. Good luck with your own still life adventures! -J
0 Comments
Since Minnesota winter is in full swing, I figured everyone could use a post that will remind them of warmer weather! Today I am going to tell you all about my adventures of painting on a friend's electric box this past summer. You may be asking, "Are you supposed to paint on an electrical box?" And my answer is, "I'm not sure! Too late now!" HA! Anyway, I started off by checking out the electrical boxes, and they were in a grouping of two. The friend who asked me to do this did not want these to look like electrical boxes, but wanted them to blend in and look natural, like landscaping. I decided I would definitely use outdoor, weatherproof paints that I purchased at Walmart. I primed the boxes with white spray paint primer. Then I started painting that background, grass-with various shades of green and yellow, giving it lots of depth. I only used 6 different colors (yellow, green, orange, red, white and brown) and did a lot of mixing. For the grass background I actually used a rag to apply the paint--this made the process go a little bit faster and gave it a neat texture of the tall grass. On top of the shorter box I did a bright yellow/orange flower. Here I used rags, paintbrushes and rounded sponge brushes and various internet sources to make this flower! After this large flower, I started painting small flowers on the lower part of the boxes, then I moved on to the large ones. I worked with various colors and textures to make these realistic. I added different leaves and cat tails and more grass to give it depth. I finished with a spray paint top coat. This is how it turned out! Now I know I said this post would warm you up, but you should know that the painting of these electrical boxes did not come without a little bit of bad weather.... It rained multiple times as I was working, and the rain caused me to run inside the garage, which caused me to leave my paint outside, which THEN caused me to remember I left the paint outside--BUT, I did not remember that I left the paint right outside the door....And this is what happens. Needless to say I was out in the rain sweeping paint off of the sidewalk for quite some time. UGH. And as my picture says "yet again", that means this was not the first time paint was spilled. Oh no. The first time it rained I did bring the paint inside the garage. As I waited for the rain to pass, the family that owns these lovely electrical boxes came home, pulled into the garage, and ran over all the paint. Yes, all of it! Not sure if you have ever seen a pint or gallon of paint being run over by a van, but I will tell you that it pops, and goes ALL OVER. We had to take a pressure washer to the entire garage!
Paint was then spilled again when I was not there and one of the kids ran over the paint again with a four wheeler...WOW! This project was a mess, but it was fun. Thank goodness this family was so laid back and didn't let a gallon of spilled paint all over their garage and sidewalk bother them. And thank goodness it was all worth it and turned out so great! Hope this post brightens your day and warms you up! -J |